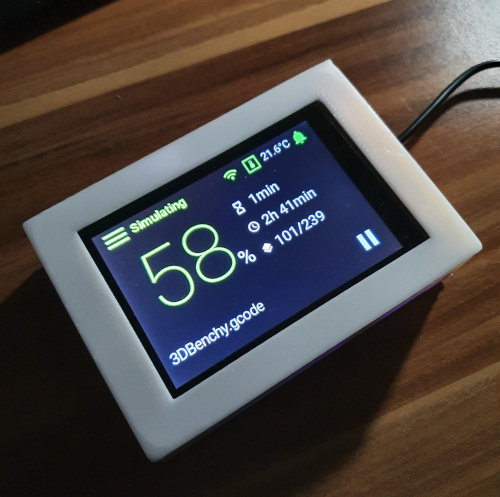
RepPanel is an open-source embedded user interface for Duet3D and RepRap based 3D printers. It runs on the ESP32 and uses a 3.5″ touch screen for user interaction.
Check out the RepPanel HWv2 version with improved and ready to flash off-the-shelve hardware
The all-in-one module is currently not available but you can give me an idea of how much interest there is. The module will be ready to use and thinner than a DIY solution. It includes a custom board, display and more capable ESP32 (more storage for directory listings etc.). I would try to get the price somewhere ~50-60€ + shipping from Germany. Click the link above and enter your email to get notified when a module becomes available. Thanks!
Visit the project page on GitHub!
The latest release is working great. Feel free to contribute!
An embedded UI for Duet & RepRap based 3D printers.
Hardware costs are as low as 25€ (~18€ touch screen + 7€ ESP32 DevKit).
Thanks to the embedded UI boot times are basically non-existent and responses are fast. No need to setup & enter Duet Web Control on your laptop, tablet or smartphone (Duet Web Control on a mobile browser is no fun in case you haven’t realized). However, PanelDue is not intended to deliver all functionalities of Duet Web Control, nor to replace it.
RepPanel is not intended to replace Duet Web Control.
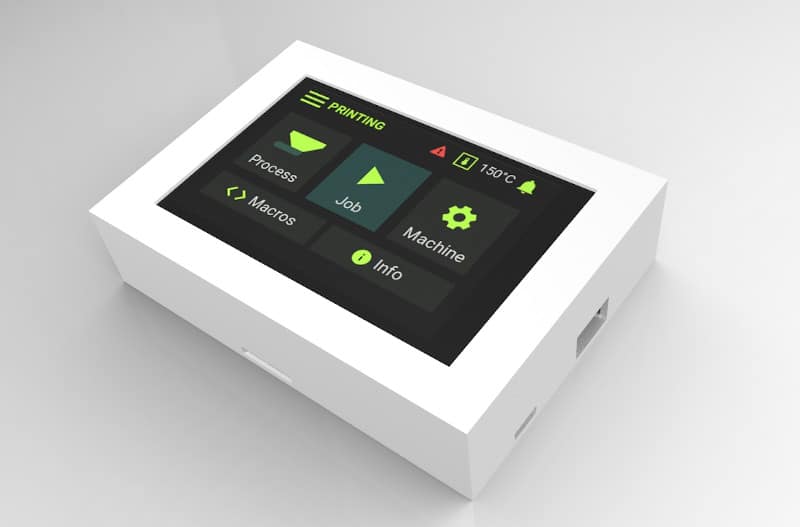
RepPanel can be connected to your Duet via WiFi/Network or directly utilizing the PanelDue port on your Duet. Currently, only WiFi connections are supported. It supports all important functions to set up, start and monitor a 3D print.
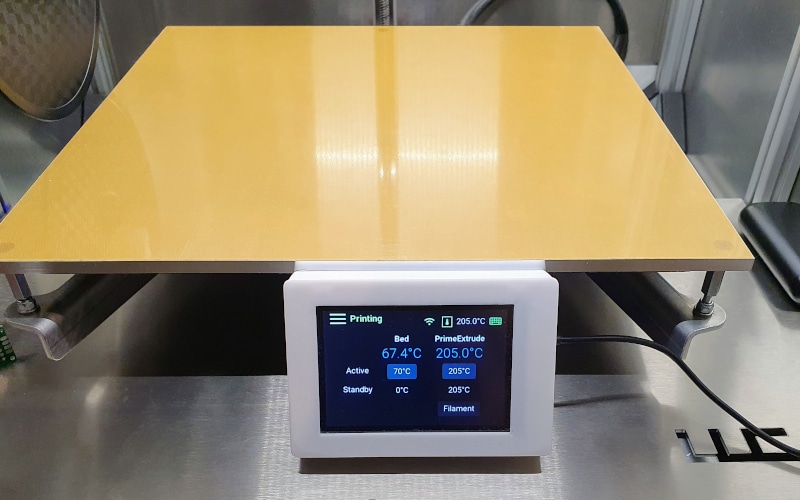
Thanks to the ESP32 no wired connections are necessary to connect to your 3D printer. For stationary monitoring directly at the 3D printer, connect the hardware directly to the PanelDue port. Using Pogo pins for the connection will allow you to simply attach & remove RepPanel from the printer. Hock it up to a power bar for phones and monitor your prints from everywhere around your house using the WiFi connection.
The firmware is optimized for 3.5″ screens with 320×480 resolution. The smaller screen lowers the cost for hardware, while the functional UX design makes sure all important functionalities are accessible and easy to use.
RepPanel is based on the LittlevGL/LVGL port for the ESP32. This means all displays supported by lv_port_esp32 are also supported by RepPanel.
Project Update 01.08.2022
Project Update (01.01.2022)
- Support for 3D Printers using RepRapFirmware 3.4 using the Object Model
- Added screensaver after 60 seconds for continuous operation with a 3D printer
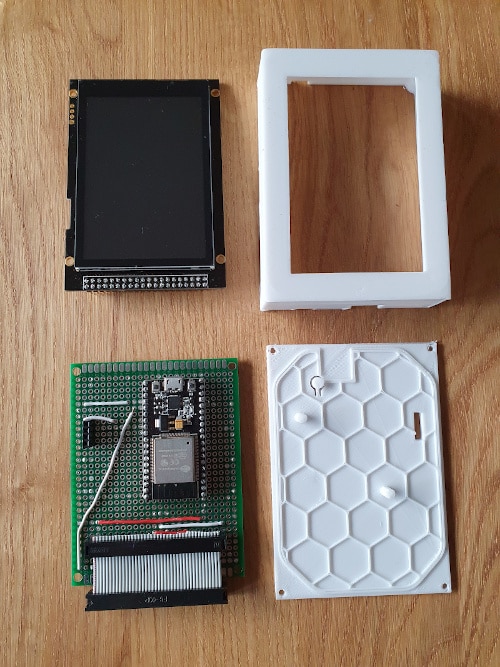
My Hardware Setup
In this section, I want to into detail about my personal hardware setup for RepPanel.
- ESP32 DevKit v1 with 38GPIOs
- ER-TFTM035-6 display module with capacitive touch panel
A faster 8bit parallel connection between display & ESP32 might be reasonable. Currently, RepPanel only supports SPI connections. Those are not blazing fast, but get the job done OK.
Hi,
Very interested in this project and have ordered the parts today.
Do you have a design for the case you 3D printed?
Would you have the design of the case that you can share please.
Sure, I’ll get the files ready tomorrow
Files are now online
Cool,
5″ or 7″ possible?
Not out of the box. Its embedded UI and optimized only for 320×480 – not the typical resolution of 5″/7″ displays
Hi.
Would it be possible to use 4,3” dmt48270c043 06WT that comes with Ender 5 Plus?
It is quite fine, and mounted nicely in the chassis.
The resolution is 480×272.
No. The resolution is not negotiable. It has to be 480×320. Embedded UIs do not really autoscale/resize. Besides the Ender screen seems to be monochrome.
Very interested in building this. Would you post a link to the custom breakout board? It would be pretty difficult to replicate without it. Thanks!
I built it my own. PCR on the Duet-Forums sold a couple of PCBs for the project if you are interested.